An Advanced Find is used to query the database to retrieve information. It can be a simple search or a more complex search with more narrow results. Advanced Finds can use one or many tables for search criteria.
An example of a simple search: Contacts with email addresses that contain .edu

The Look For field shows the field the system will use to start the search. Different field allow you to search different criteria, so if you aren't finding the option you need you can try changing this field for other options.
If you need more data to appear in your search results you can select Edit Columns and a popup screen will appear.
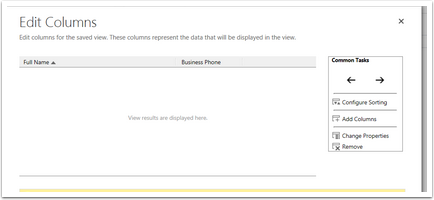
Select Add Columns and another pop up will appear that allows you to select fields to pull from for your search results.

You can change which fields are available in the column selections by changing the Record Type to a different entity to get more fields.
To share your advanced find with others, open your Saved Views, select the view and click Share in the top ribbon tool bar.

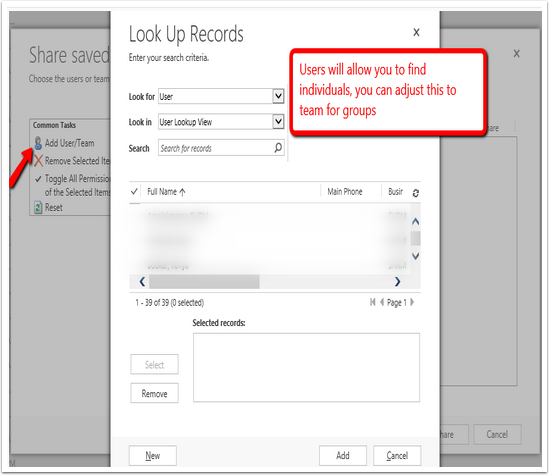
Click Add User/ Team and select Users from the Look Up Record popup.
Once you have selected who to share it with you can also decide what permissions they have to work with.

Users will let you select individuals, so you can share with only a couple people if you wish. You can also change the look for Teams and select groups.
- Read - gives others permission to see and use the advanced find.
- Write - gives others permission to edit the advanced find.
- Delete - gives others permission to delete the advanced find.
- Append - Not available
- Assign - gives others permission to assign the advanced find to someone.
- Share - gives others the permission to share the advanced find.
If you selected a user or team and change your mind you can select them and click Remove Item.
If you want to give all permissions to people (rather than clicking each box) You can select the users and/or teams you want to share all with and the select Toggle All Permissions of Selected Items. (At that point then you can still click the individual boxes to remove permissions for a user if you don't actually want them to have all).
If you really aren't happy with what you've done you can RESET and start over.
Once you have the people and permissions set correctly you can SHARE.
Other users should now be able to see you find in their views list.